As soon as I saw this Cake Pops recipe I wanted to make cake pops and Halloween seemed like the perfect occasion. As it turns out cake pops are very time consuming and a lot harder to make than I thought they would be. You can read all about my first failed attempts in my previous post “How NOT to Make Cake Pops”. I’m happy to say that I finally figured out the trick to cake pop success and I will share my tips with you below.
To see how I prepared the cake balls themselves, pop over to “Halloween Cake Pops Part 1” which has baking photos and tips.
Decorating Cake Pops Step 1: Melt the Chocolate
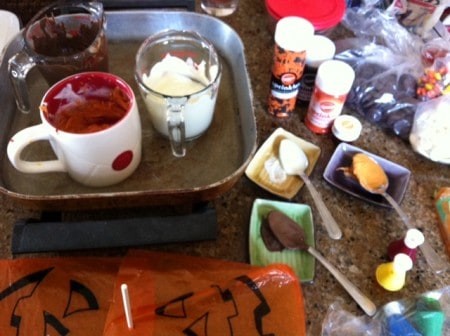
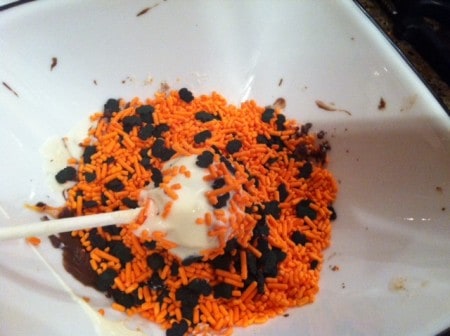
To melt the chocolate I put white and dark melting chocolate in Pyrex containers and set them in an inch of water in an electric frying pan set to just below simmer. If the chocolate is too hot it will start to harden and take on a fudgey texture. It’s important not to drip any water in the chocolate as it will ruin it’s ability to melt nicely. I have different spoons for each chocolate pot so that I can occasionally stir or aid in the dipping:
Decorating Cake Pops Step 2: Secure the Sticks
Before you start dipping your cake balls in the melted chocolate there are two essential steps (in order to avoid cake pop flops). I’m very grateful to a friend of mine for letting me in on this little secret as it made all the difference in the success of my cake pops:
First, place your chilled cake balls in the freezer for approximately 20 minutes, just enough so that they will hold their shape when you insert the lollipop sticks.
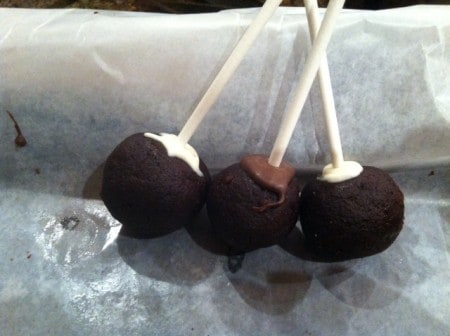
Second, dip the end of the lollipop stick in melted chocolate and immediately insert it into a cake ball. It helps if the chocolate forms a ring around the lollipop stick at the base of the cake pop. This will help secure the stick in the cake pop so that the cake ball won’t fall off when you dip it in the chocolate.
Once you have inserted all of the lollipop sticks using this method then pop them all back in the freezer to really secure those sticks and make sure the cake isn’t going to crumble or fall off when you go to dip it:
Decorating Cake Pops Step 3: Drip Before you Dip
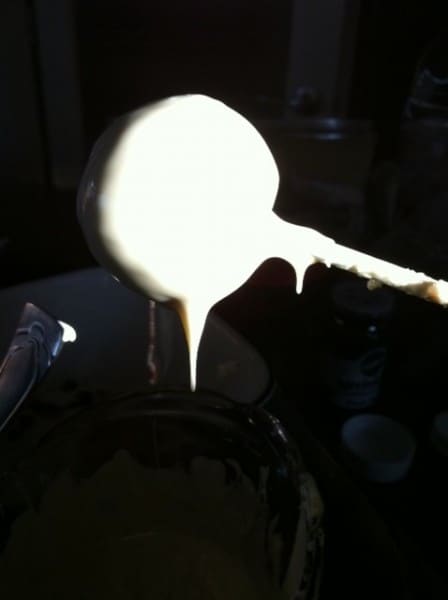
Dip the cake pop into the melted chocolate so that it is fully covered, then pull it out and let the excess chocolate drip back into the melting pot. You can even gently tap the lollipop stick on the side of the pot. This will ensure that the weight of the sprinkles won’t cause your chocolate to drip down the stick taking the sprinkles with it!
Decorating Cake Pops Step 4: Add Sprinkles
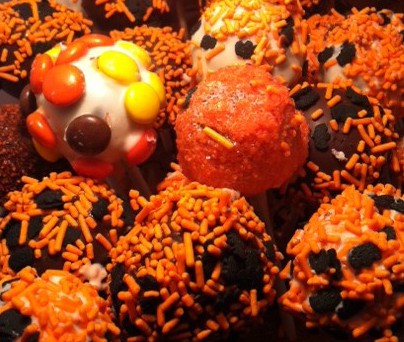
Add the sprinkles before your chocolate hardens either by sprinkling them over the cake pop or by rolling the cake pop in a bowl of sprinkles:
Decorating Cake Pops Step 5: Stick and Set
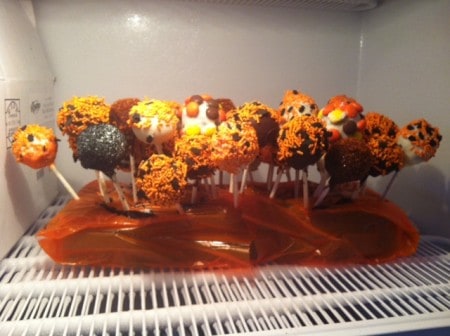
To let the cake pops set stick them in a block of styrofoam (or I’ve also seen them stuck into an upside down egg carton) and pop them in the freezer so the chocolate will really harden and set in place. If your party is a few days away you can leave them in the freezer but I don’t recommend leaving them longer than that as the cold air will dry out the chocolate and it could even give it a white tint. But a few minutes to a few days is no problem:
I’m so excited for my guests to see and sample my Halloween Cake Pops this weekend. That is if my husband and I don’t eat them all first!
Tags: baking, cake pops, dip, how to, melt chocolate
Filed under: Art for your Lifestyle.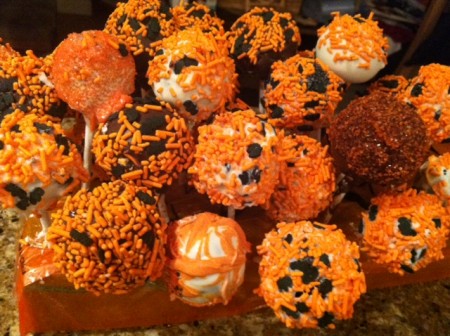

They are so pretty! Huge project to do. You must be an artist or something!!! Chloe has a little machine that makes perfect cake balls. It’s for cake pops but she makes timbits too
Thanks Carrie! That’s cool that Chloe has a machine. Mmmm, I bet timbits would be just as good and you wouldn’t have to worry about them falling off the lollipop sticks! :)
I want to eat them all!!!
Thanks Drex! They are super yummy. For over two days of work I’m sure they’ll be gone in 10 minutes. ;p
What a Foofara! Funny too. You had the patience to make and decorate cakes in your past too. Everyone should be very impressed!
Thanks :)
Yeah, you’d think it would have been easier for me considering I’ve made cakes and chocolates in the past. haha :)
I’m glad they turned out great in the end though!
They are fantastic Kendra!!!!!!!!
Thanks Pink!! :)
These are so fun to make !! Have you tried again since? will you be doing any for Valentines day???
Thanks Sherry! I just tweeted a pic of your dragon head cake pop. So cool. Are you on twitter? Thanks for checking out my blog and leaving a comment. It was super fun to make these (even though it did take me two days! lol). I won’t have time to make any for Valentine’s Day but hopefully I’ll give it a try again one day. Have you ever made pie pops? They look so yummy but I wonder how you get them to stay on the stick?
“Second, dip the end of the lollipop stick in melted chocolate and immediately insert it into a cake ball. It helps if the chocolate forms a ring around the lollipop stick at the base of the cake pop. This will help secure the stick in the cake pop so that the cake ball won’t fall off when you dip it in the chocolate.”
AHA!!!! I knew there was a secret! I have banged my head on the counter – taken to binge eating the “extra cake” all over the pops slowly heading south down the stick once they were propped up!
Can’t wait to use the “secret” on my next try!
Love the blog so glad I found it!
Thanks MJ, I hope it works for you! The other most important part I found was to put the cake pops in the freezer for a few minutes up to 20 minutes at this stage so that the chocolate sets and the cake hardens a bit into its shape. This makes dipping cleanly so much easier! Thanks for reading :)
Thanks for sharing this!!! I just made my first ever pop cakes…chickens for easter. The first few turned out, but then I just wasted $25 of white chocolate……I didn’t know you couldn’t add certain food colourings and thought i was just burning the chocolate or something….so just googled it and found your page.
Seeing your flops made me feel a lot better! everything that went wrong with you also went wrong with me! ;) I need the chickens for tomorrow, so I am going to buy more chocolate from the petrol station, and they will just have to be white chickens, as I now know that the food colouring isn’t going to work! which I found out the hard and expensive way!!! :( Yours look great. thanks for sharing :)
Hi Michelle, Thanks for commenting! I feel your pain about the chocolate! Check out the comments on Part 2, someone said there is a special kind of food colouring for chocolate, and another lady is making hers with the coloured melts. I didn’t hear back from her to see how it went but it’s certainly somerhing I would experiment with next time.
Good look with your Easter chicks! I’m sure they’ll be really cute white.
Kendra :)
I was so happy when I found this information when I googled “cake pops dripping”. I ended up throwing all of mine away out of frustration. I am trying to make some pops for my sons 2nd birthday party this weekend. I first started out by melting chocolate chips and that didn’t work well. Then I looked up alternataves and found that you can melt cake frosting and then dip the pops in that. Well…easier said than done!! I can’t seam to get the frosting to harden at all and it just runs down the sticks and makes a mess…ahhhh! I even got out a fan and held the pops in front of that to try to get them to dry enough to put them in the rack. Any suggestions on how to “frost” these puppies??
Thanks so much:)
Abby, what kind of icing did you make? Try making some Royal Icing, the kind made with eggwhites, it will harden right away. Good luck!!!
I’m having problems with dipping cake pops. Always my choc cake pops. Doing hello kitty put white chips on waited tell the ears set. Went to dip in white candy melt they fell off stick. After I inserted stick in cake pop. I put in freezer for a little bit. Then brought back out. Warmed white melts dipped and they fell of stick. I’m a little up set so I just put the remaining in deep freeze. Will try again tomorrow. Tell me what I’m doing wrong. They aren’t very big cake pops.
Michelle, before you put the stick in the cake pop, did you dip it in melted chocolate? Then insert the stick while the chocolate is still melty. Put them in the freezer for 20 minutes before dipping. The chocolate will harden on the stick and act as an anchor. It works even better if some of the chocolate forms a seal around the base of the cake where the stick comes out. Good luck!!!
Thanks for all the great tips! My daughter loves them an my family is cookies out! Thanks!
Just wanted to let you know you can add powder based colouring to chocolate and it doesn’t change the consistency. Also adding vegetable fat to chocolate helps with it being more workable. You do this when your melting the chocolate. But the colour afterwards.
Btw great blog. Very helpful. I’m going to use my cake pop machine tomorrow hopfuly it works with GF cake mix.
Take care
Angy