Posts Tagged ‘how to’

How to Avoid Painter’s Block with a Commission

Wednesday, November 2nd, 2011

I was recently commissioned to paint a picture of Mount Hosmer and naturally the Fernie Ghostrider. Here is my original painting the lady saw which she liked:

Fernie Ghostrider, Original Painting of Mount Hosmer by Kendra Smith Dixson, copyright 2002

Often times when I get a commission I tend to freeze up. It’s a lot of pressure to paint a commission and it can give you “painter’s block” if you don’t mitigate those feelings. Why is it so much more difficult to paint a picture for someone else than for yourself? For one thing it is hard enough to “get it right” when you’re painting from your own vision, but it’s very difficult to paint what’s in someone else’s head.

  • How do you know if this is what they had in mind?
  • What if they don’t like it?
  • Can I use my painter’s intuition or do they want it to be “just so”?
  • What is “just so”?

Questions like these and more can float around your head and block the creative flow.

Well, last weekend I heard a suggestion that may change the way you think about commissions forever. I was taking Alex Fong’s watercolour workshop, The Magic of Watercolour, and he was talking about commissions. He said that his trick to take the pressure off is to paint three different versions of the commission and then give the client a choice.

“Paint three?” you may be asking, “isn’t a commission hard enough work in the first place, let alone tackling it three times?” Yes, a commission is hard work, but part of the hard work is the struggle with the mental block of painting a commission. Imagine how much easier the paint would flow if you could lift that block and paint without any of the associated pressures of painting a commission. It would be freeing.

Painting three paintings can take longer than painting one, but I have always found that in painting multiple pictures I tend to improve as I go. You will start to see shapes better. You will loosen up and carry your brush with a lighter touch using bold confident strokes. Here is a chance to learn and grow as an artist.

Your client will be impressed that you have provided them with three choices. Plus, as Alex says, it alleviates that awkward pause while you’re wondering “do they like it? Gosh, what if they don’t like it?” when the client first sees your finished piece. This way they have a choice, they can pick their favourite. It actually takes the pressure off the client as well who may be asking themselves “Will I like it?”, “What if I don’t like it?”, “What will I say?”.

I have tried this approach a few times before and it has worked great. My clients have been thrilled and once I even sold two pieces instead of one!

Here is my latest commission which I actually painted four times. Which one do you think she will choose?


Legend Lives On, Fernie Ghost Rider Painting by Kendra Dixson. copyright 2011

Mist Rises on the Ghostrider, Fernie Ghost Rider Painting by Kendra Dixson. copyright 2011

Indian Princess, Fernie Ghost Rider Painting by Kendra Dixson. copyright 2011

Fernie Ghostrider Painting by Kendra Dixson. copyright 2011

How to Make Cake Pops

Tuesday, October 25th, 2011

<– Part 1 | Part 2 | Part 3


Halloween Cake Pops

As soon as I saw this Cake Pops recipe I wanted to make cake pops and Halloween seemed like the perfect occasion. As it turns out cake pops are very time consuming and a lot harder to make than I thought they would be. You can read all about my first failed attempts in my previous post “How NOT to Make Cake Pops”. I’m happy to say that I finally figured out the trick to cake pop success and I will share my tips with you below.

To see how I prepared the cake balls themselves, pop over to “Halloween Cake Pops Part 1” which has baking photos and tips.

Decorating Cake Pops Step 1: Melt the Chocolate

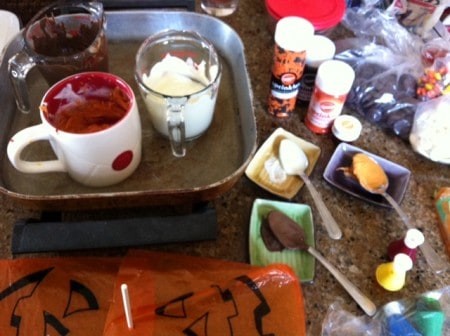
To melt the chocolate I put white and dark melting chocolate in Pyrex containers and set them in an inch of water in an electric frying pan set to just below simmer. If the chocolate is too hot it will start to harden and take on a fudgey texture. It’s important not to drip any water in the chocolate as it will ruin it’s ability to melt nicely. I have different spoons for each chocolate pot so that I can occasionally stir or aid in the dipping:

Cake Pops Set-Up for Melted Chocolate

Decorating Cake Pops Step 2: Secure the Sticks

Before you start dipping your cake balls in the melted chocolate there are two essential steps (in order to avoid cake pop flops). I’m very grateful to a friend of mine for letting me in on this little secret as it made all the difference in the success of my cake pops:

First, place your chilled cake balls in the freezer for approximately 20 minutes, just enough so that they will hold their shape when you insert the lollipop sticks.

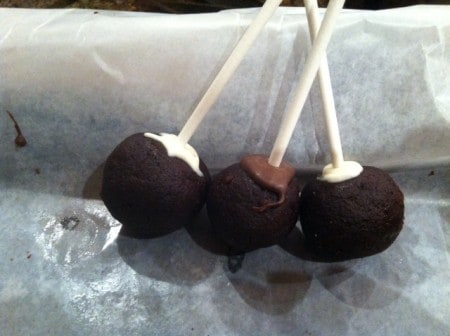
Second, dip the end of the lollipop stick in melted chocolate and immediately insert it into a cake ball. It helps if the chocolate forms a ring around the lollipop stick at the base of the cake pop. This will help secure the stick in the cake pop so that the cake ball won’t fall off when you dip it in the chocolate.

Once you have inserted all of the lollipop sticks using this method then pop them all back in the freezer to really secure those sticks and make sure the cake isn’t going to crumble or fall off when you go to dip it:

Secure the sticks in the cake pops with melting chocolate and set in freezer

Decorating Cake Pops Step 3: Drip Before you Dip

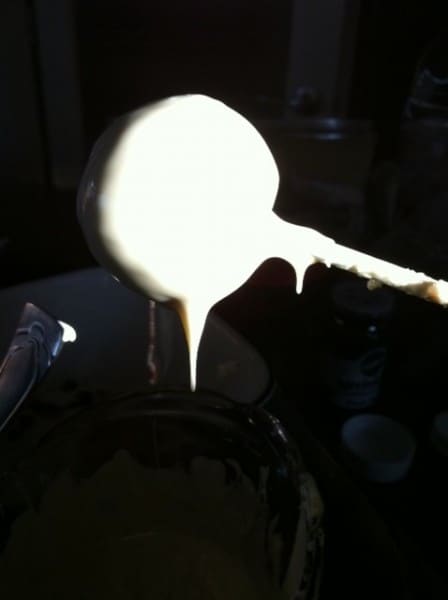
Dip the cake pop into the melted chocolate so that it is fully covered, then pull it out and let the excess chocolate drip back into the melting pot. You can even gently tap the lollipop stick on the side of the pot. This will ensure that the weight of the sprinkles won’t cause your chocolate to drip down the stick taking the sprinkles with it!

Drip the excess chocolate off of the cake pops before adding sprinkles

Decorating Cake Pops Step 4: Add Sprinkles

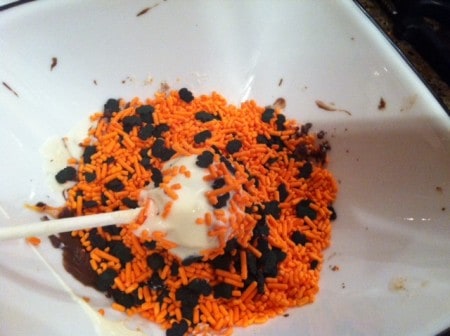
Add the sprinkles before your chocolate hardens either by sprinkling them over the cake pop or by rolling the cake pop in a bowl of sprinkles:

Roll the Cake Pop in Sprinkles

Decorating Cake Pops Step 5: Stick and Set

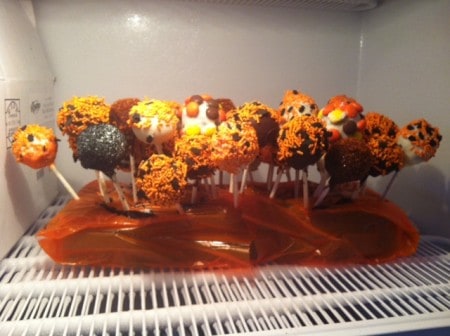
To let the cake pops set stick them in a block of styrofoam (or I’ve also seen them stuck into an upside down egg carton) and pop them in the freezer so the chocolate will really harden and set in place. If your party is a few days away you can leave them in the freezer but I don’t recommend leaving them longer than that as the cold air will dry out the chocolate and it could even give it a white tint. But a few minutes to a few days is no problem:

Put the Cake Pops on a styrofoam block and harden in freezer

I’m so excited for my guests to see and sample my Halloween Cake Pops this weekend. That is if my husband and I don’t eat them all first!

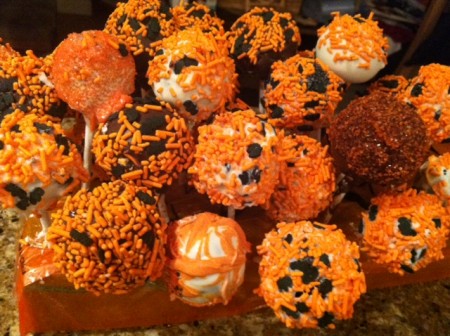
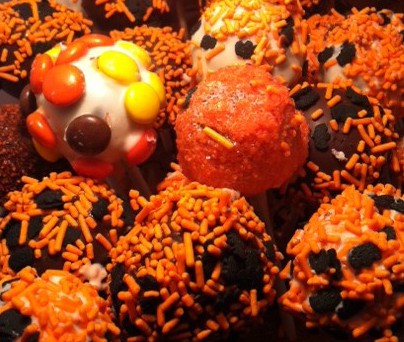
Cake Pops with Black and Orange Sprinkles and Reeces Pieces

<– Part 1 | Part 2 | Part 3