Wow, it’s been a whole year since the last day of my teaching job. Last year in February I gave my notice at the Digital Art School where I worked part time, so that I could paint full time. With the Olympics a year away I didn’t want to be stuck marking projects, I wanted to be in my art studio painting Whistler mountain scenes!
Giving my notice at work was a financial risk for me and it paid off big time, but maybe not in the way you might expect. You see, after a whole year of painting full time with the end goal of the Olympics in mind, I ended up not selling one single painting during the Olympics. This was a huge disappointment to me of course, but when I look back at what I have gained over the last year, I have to say that it was definitely worth it.
Having the time to paint full time gave me the freedom to express myself creatively. My painting time was no longer limited to a few days every couple months. When I paint sporadically it is like starting from scratch each time; the first few paintings never quite turn out. However, when I have the chance to paint continuously for a longer block of time then I am really able to get on a roll. The paintings just start to flow.
It was such a great feeling to go to my studio every day. I feel like my paintings jumped up to a new level of colour and intensity. So even though my year didn’t quite turn out the way I envisioned, the creative rewards were definitely worth the risk.
Do you have any stories of a time when you took a risk and it paid off, financially or otherwise? Share your comments, I’d love to hear from you!
I have always had a bio and more recently a mission statement, but I have never written an artist statement. It is something that I have thought of doing for a while now and I finally got inspired to take the plunge and create an artist statement for myself. Please feel free to comment with feedback. Thanks!
I am a professional artist, designer and workshop instructor. I paint original acrylic and watercolour paintings ranging from the whimsical to the realistic. I have my father’s eternal optimism and it comes out in the light in my work. My watercolour paintings are filled with light and life and love.
My paintings are mostly of nature which touches people’s heart in a place that brings them back to their childhood. The promise of an escape into nostalgia makes us smile and fills us with hope.
I love watercolours because of their purity and luminosity. The transparent watercolours allow the light to reflect off the paper which can make a painting glow. My favourite scenes to paint are in the snow which is pure and elegant on its own. Snow is natural to paint in watercolour because it is mostly the white of the paper. I’ve found a lot of joy in finding all of the different nuances of colour that you can actually find in snow and then making them come to life by painting in the shadows.
My acrylic paintings have a different nature altogether. I use vivid colours and paint brightly coloured flowers and leaves as my main theme. I like to start with the colour of my subject as a ground on the canvas and then paint the background around it.
While my painting styles are different for the two mediums, all of my work is about discovery. I am exploring the nuances of nature and discovering new ways of seeing the world. I often paint in the quiet. As my right brain takes over, time can pass without me even realising; when I get into the zone and I’m laying down the perfect wash, it makes my heart sing.
I was inspired by Dora Themelis to write this post. (You can find her on twitter at http://twitter.com/DorasPaintDrips.) I commented on her post about painting with watercolours where she compares two wonderful portraits she has done. Thinking about the importance of the materials behind every artist prompted me to write more of my own experience in a blog post as well.
Watercolours aren’t easy at first and especially for complicated subjects. The more detail you are adding to a painting the higher the possibility of roughing up the paper surface causing streaks, lines and smudges to appear in your painting. This is very discouraging for the beginning artist and can deter some people from painting with watercolours. Watercolours are known for their pure luminous quality so it is extremely frustrating when all you end up with are dull overworked paintings.
It can take a lot of practice painting layered transparent washes but with the right paints and techniques it is possible to end up with a glowing rich painting. I also believe that the paper you are using can make a world of difference.
For example, a heavier paper would make the whole process so much easier. I use 300 pound cold press paper and it really helps. It’s hard to explain how much difference a paper can make but it can truly be a huge factor in the success of the painting. The cold press paper has a rough texture which gives the painting a “tooth” for the paint to grab onto which is great for dry-brushing texture such as ice, bark, pebbles, a roof, etc.
The weight of the paper makes it less susceptible to curling and puddling. It also makes the paper more forgiving which means you won’t be as likely to rub off the surface fibres of the paper as you apply multiple brushstrokes in one area.
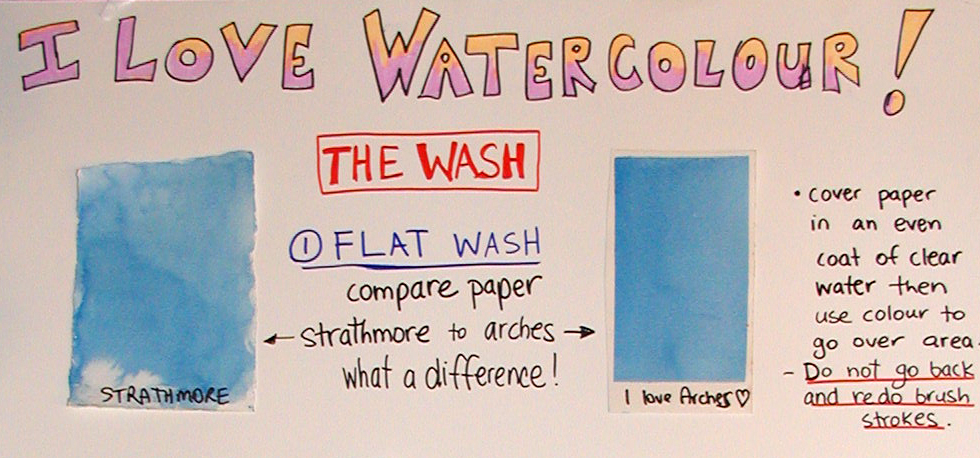
It’s also important to note that the brand of paper you are using can also a big difference which in my opinion can be night and day. I love Arches paper. The colours seem to blend a lot smoother. It has just the right amount of sizing which is applied to these cotton papers so that they won’t absorb the water too quickly. I guess it kind of protects the paper from getting waterlogged in a way. I have used other papers which have been nearly impossible to paint a smooth clean wash on without getting streaks or run-backs, cauliflower like stains in the painting.
Here is an example of two washes I made using 140 pound paper of two different brands. I used the same technique in both examples. As far as painting styles you will develop your own as your familiarity with the medium increases. Watercolour can be frustrating for sure, but I absolutely love the medium. When I lay down the perfect wash it makes my heart sing.
In January I was a guest artist at the Sun Peaks Winter Wine Festival. To attract people to my table I demonstrated intriguing watercolour techniques using ordinary household items.
I can’t say I ever had a massive crowd lined up at my table; however, one man did wait 15 minutes to find out how to paint a birch tree with a fork! In fact, the organizer of the event came and told me that people were talking about my birch tree with a fork demo all the way up the village!
Here I will share with you the tricks behind the techniques: the unveiling of the magic!
1. How to Paint a Birch Tree with a Fork! The first step is to paint in the background around the area where you want your tree to go, leaving that part white. Next, wet the paper along the tree trunk and drop in your shadow colours. Then use the handle of the fork to create the birch bark along the tree by pushing it into the paper and dragging it across the tree in various parts of the trunk. This will cause some of the paint to be lifted revealing the white birch, and some of the paint to seep into the crevasses which makes the dark lines of the bark. You can then dab in a few drops of dark paint for contrast. If you paint in any branches, use one of the prongs on the fork to scratch along the branch to create texture.
2. Turn Salt into Snowflakes! This one is so fun, and literally quite magical.
As with the birch tree you must save your whites, so paint your background colour around any white areas, such as the snowmen in this example. While the paint is STILL WET, sprinkle some salt onto the painting.
At first you won’t notice any change, but slowly as the paint dries the salt will absorb some of the water and as it does it will also draw some of the colour towards it. This will leave magical little snowflakes in their wake. The wetter the painting when you drop in the salt the bigger the snowflakes (you can actually get quite a blizzard going), and the drier the paint the smaller the snowflakes will turn out, which works great if you are trying to create stars in the sky!
3. Paint Under Water with Cellophane! To clarify, I am not actually putting the paper under water and then painting it using cellophane. This is what my dad thought when he read my last blog post. I thought about changing the title to be more clear, but then since the purpose of my titles was to intrigue people, and my dad was immensely curious, I decided to leave it. What I am actually doing is painting an under water scene with the aid of cellophane.
This is also very fun and a great exercise for giving up control since you never know how it is going to turn out. What you do is paint on your background very wet.
Make sure the paint is a lot darker than what you want it to be since a lot of the colour will be lifted off by the cellophane which you then place over the painting.
Press the cellphane into the wet paint and then let it dry. When you peel it off you will see the abstract pattern that it created in the painting. In this case it is meant to represent the light refracting through the water.
4. Use a Candle to Make a Moonlit Reflection In this exercise take an ordinary white candle (I used a tea light) and rub it gently over the dry paper where you want your reflection to appear. This is a little like using a magic pen to write a secret message which will not be revealed until you paint over it (another great idea for a demo!).
Since you want your horizon to lay flat it is imperative that you use horizontal strokes to create the reflections. The harder you press the whiter the reflections will be. Make sure you don’t get any candle wax above the edge of the water since you won’t be able to cover it up later. Now you simply paint your picture. The darker the colour you use for the water the brighter your reflections will appear.
In this case I waited for the paint to dry and then I used a damp brush to scrub some extra vertical highlights to make it really sparkle.
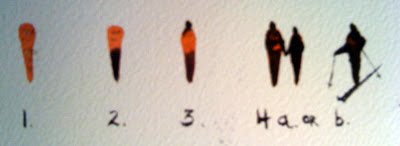
5. Turn a Carrot into a Person! I can’t remember where I learned this trick but it is the best thing for painting natural looking people walking in your landscapes. This one works just like it sounds. First you paint a carrot. It doesn’t have to be orange, but I made this one orange for good effect. Don’t paint the greenery (unless you are painting someone in a Mardi Gras parade). Next add a head. Don’t paint the neck or it will look awkward. That’s pretty much it, but then it’s up to you if you add arms or props like skis and poles!
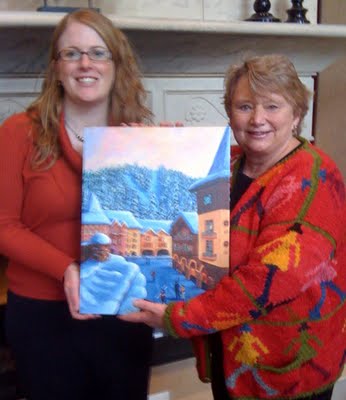
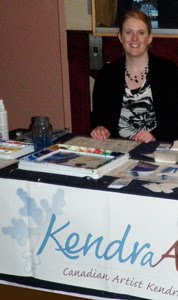
Here is an example where all the people started out as carrots: I can’t say I had as many onlookers as I hoped, but I can say that I certainly garnered a lot more interest due to these tips and tricks using everyday items. I also had a free draw which helped attract people over to my table. The highlight of my whole weekend was the delighted reaction from the grand prize winner. She couldn’t have been happier and that absolutely made my day.
Here I am with the winner of my Sun Peaks limited edition giclee.
This week I experienced firsthand the power of saying goals out loud. When you say a goal out loud the Universe immediately begins to conspire to bring that goal to life. For example, last week I said that I was going to try and drum up some graphic design work and I made a plan to call one of my old clients the next day. When I sat down at my computer in the morning there was an email in my inbox from that exact client and I hadn’t even called him yet!
Did my saying it out loud make it happen? I don’t know, but I love the idea that it could have. I’m tempted to believe it did. There’s more. That very afternoon my lifecoach introduced me to one of her friends who needs some graphic design work done on her website!
I did not even seek this out! All I did was say out loud that I wanted to do more graphic design work, and ta da! the Universe hands me 2 clients the very next day!
This gets even better… last night my studio partner and I said that we want to expand our territory and then today I met for coffee with one of my friends that I graduated with a few years ago and she is opening her own gallery! She invited my studio partner and I to be two of the artists in her gallery Wine Valley Accents!
If all of this can happen just from saying my goals out loud, imagine what will happen when I start to write them down.

 In January I was a guest artist at the Sun Peaks Winter Wine Festival. To attract people to my table I demonstrated intriguing watercolour techniques using ordinary household items.
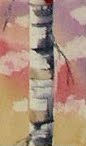 The first step is to paint in the background
 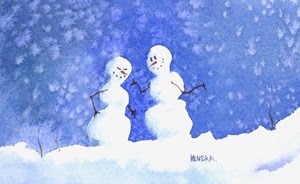 This one is so fun, and literally quite magical.
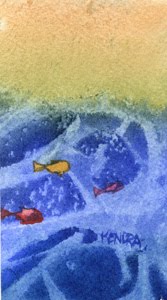 To clarify, I am not actually putting the paper under water and then painting it using cellophane. This is what my dad thought when he read my last blog post. I thought about changing the title to be more clear, but then since the purpose of my titles was to intrigue people, and my dad was immensely curious, I decided to leave it. What I am actually doing is painting an
 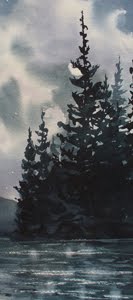 In this exercise take an ordinary white candle (I used a tea light) and rub it gently over the dry paper where you want your reflection to appear. This is a little like using a magic pen to write a secret message which will not be revealed until you paint over it (another great idea for a demo!).