<– Part 1 | Part 2 | Part 3 –>
Okay, so in my last post on Halloween Cake Pops I was so excited at how my cake pops were turning out. I proudly displayed all the wonderful photos of preparing the cake and icing and mixing it to form the cake balls (see Part 1 Halloween Cake Pops here). I couldn’t wait to keep working on them but little did I know what was in store for me.
In the cake pop tutorial I used each cake pop looks perfect and so easy to make:
I love this recipe. (click the picture above to see the full article)
So how could I go wrong, right? Well, as it turned out, there are plenty of ways to go wrong when making cake pops and I am here to help you avoid the mistakes I made in my cake pop baking adventure.
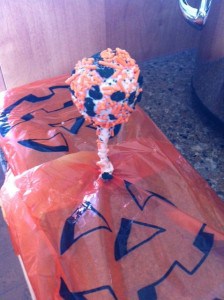
Cake Pop Mistake #1: Drip Stick Disaster
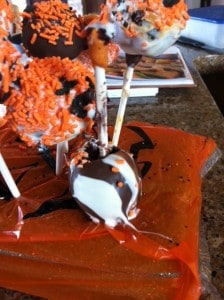
If you don’t carefully drip off the chocolate before you roll the cake ball in sprinkles, the whole mess will start dripping down the lolipop stick. Ack!
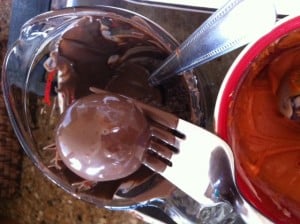
Cake Pop Mistake #2: Cake Sticks to Fork Mess-Up
If you have ever made chocolates you may have used this trick of letting the chocolate drip through a fork. I thought I was a genius for coming up with this nifty way to avoid the dripping disaster (see cake pop mistake #1 above). My plan was to let all the excess chocolate drip off, then I would transfer the cake ball to a bowl of sprinkles, and then insert the lollipop stick.
Unfortunately, cake is sticky and soft and it likes to attach itself to the fork and so in trying to detach the cake ball some of the cake would stay on the fork and cause a big mess. Ack!
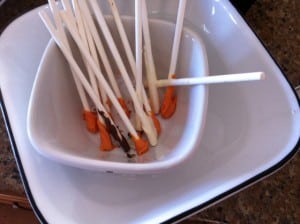
Cake Pop Mistake #3: Fat Sticks Cause Cake Ball Explosions
I found out the hard way that letting some chocolate harden on the end of the lollipop sticks is not a good way to make cake pops. Apparently you are supposed to dip a stick in the melted chocolate and immediately put it into the centre of a cake pop so that the chocolate will harden and help keep the cake pop together. Who knew that letting the chocolate harden on the sticks would make them fat and cause the cake pops to slowly explode from the added volume. And here I was trying to be efficient:
Exhibit A: Cake Pop Flop
This is what happened to one of my cake pops. The hardened chocolate on the lollipop stick created a massive hole in my cake pop and as it was setting the whole cake pop dropped down the stick onto my styrofoam base. Ack!
Exhibit B: Cake Pop Explosion
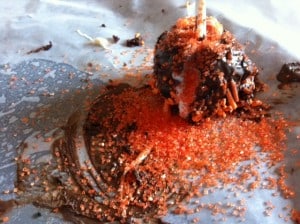
This cake pop didn’t even make it to the styrofoam base. When I inserted the lollipop stick it exploded and even though I tried to repair it with extra melted chocolate and attempted to cover my tracks with extra sprinkles, it looks like my cake pop’s guts are spilling out. Appropriate for Halloween I suppose, but not exactly the party favour I was going for. Ack!
Cake Pop Mistake #4: Clumpy Chocolate Mass
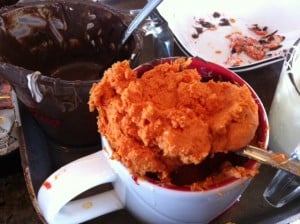
In my extra cleverness I added orange food colouring to melted white chocolate to match my Halloween theme. It took quite a lot of food colouring to get the colour I wanted. Big mistake! If you’ve ever made chocolates before you might know that you’re not supposed to add water to melted chocolate… well apparently mass amounts of food colouring will have the same effect: the chocolate will harden, clump, and take on the texture of old crumbly fudge.
Absolutely no amount of heating, stirring or added butter will make this chocolate dip-able. Ack!
Give up?
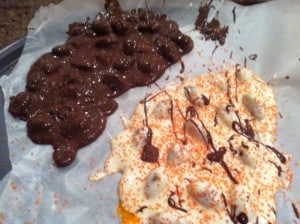
Cake Pop Alternative #1: Almond Bark with Sprinkles
If you decide to give up your cake pops, a fun way to use up the melted chocolate is to pour it over some toasted almonds to make almond bark. Add extra flare by using up some of your unused cake pop sprinkles:
Cake Pop Alternative #2: Dipped Confections
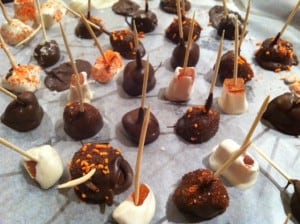
An easy way to get over your cake pop failure is to make these yummy treats which look great and are sure to please your party guests without any flops, explosions or clumps. I stuck toothpicks in pieces of Australian Gold Ginger and dried papaya. I dipped the candied ginger in the left over dark chocolate, and I dipped the papaya in the melted white chocolate. I left some of the papaya showing as it is orange and very Halloween-y. I also used up some of the sprinkles to entice visually and it also gives a yummy crunch to the candy treats. Yum!
Success!
However pleased I was with myself over these cake pop alternatives, I was still determined to make yummy and cute cake pops. Come back tomorrow to see how I conquered these obstacles, learned from my mistakes and made my cake pop adventure a success!
<– Part 1 | Part 2 | Part 3 –>
Tags: baking, cake pops, flop, mistakes, what not to do
Filed under: Art for your Lifestyle.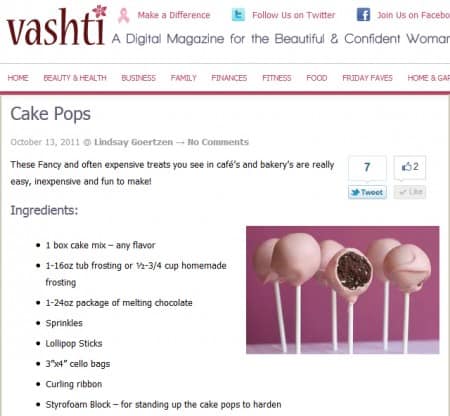

Thanks so much for your comments on cake-pop making! It really helped me. I was making Chanukah pops (blue and white) and used white chocolate with blue gel and sprinkles. Your tips helped me make it a roaring success! (almost all 18 turned out perfectly) 2 of them flopped but I was able to partially salvage them.
Thanks again.
Yay! That’s so awesome! I’m glad it helped. I’m looking forward to my next attempt at cake pops, it should go much smoother now that I know how to avoid these pitfalls! :)
UGH. After i read this i heard about the food coloring part and it made me so mad. I added yellow to make chicks and obviously it hardened. At least i know to do it never again D:
Oh no! That’s so frustrating! I felt the same when my orange coloured chocolate turned hard. The worst was when I kept adding more food colouring to soften it and of course it made it worse! lol
Like you said, at least we know not to do that in the future now!
Thanks for commenting!
Can u use gel food coloring or will it seize the chocolate up too
Hi Lucia, I’m not sure I’ve never tried it. Test it out on a small amount and see if it keeps its chocolatey consistency and if so then go for it. At least if it doesn’t work you won’t have wasted a lot of chocolate like I did. :)
You need to use powdered food coloring if you want to add color to your chocolate :)
Wilton sells candy colors specifically for this. If you are using chocolate you can put a small amount of Crisco or coconut oil once it is melted and then color with a gel food color. The Crisco stops it from hardening. :)
Thanks Jenigirl and Kaile, I will have to try powdered food colouring or the coconut oil trick with gel food colours. I used to have the Wilton gel colours but they are old and dried up on me so I’ll have to get some more.
I would suspect that you were absolutely devastated with the turn of events as you were creating your cake pops, but I have to admit that reading your blog was totally worth it. I really needed that. Thanks.
I did feel your pain however, had we given up after our first try making them, we would not be in business today. Mastering the art of cake pops truly does take time and patience, but the results can be ultimately glorious.
And for those of you that want to add colour to your chocolate and get vibrant colours, check out your local candy making supplier. There is a variety of chocolate specific colorings that can be purchased and added to your chocolate. The powders work best but be forewarned that little jar you bought which is truly expensive will disappear as you will probably need it all to do a pound of chocolate to get the true colour you want.
Happy Cake Popping
Kuchen Pops
Thank you for commenting and it means a lot that you got a kick out of my blog post. Thanks so much for the tip about the chocolate specific colourings, that is great to know! I checked out your site and I love all your cake pops on your gallery page: http://kuchenpops.yolasite.com/gallery.php. They are so detailed and look so yummy. :)
Thanks for visiting and the plug Kendra
I’m scared now! LOL!!! I have never made them, but I’m hoping they turn out. I’m working with candy melts instead of the chocolate, so here’s hoping!!!! And thank you for the tips. I am rather concerned about the stuff dripping down the stick, but I never DREAMED they could explode, too! Who knew? lol
Hi Lara, let me know how it goes. Hopefully reading this will help you avoid any cake pop flops! Did you read part 3 of this post? In part 3 I talk about how I finally succeeded at making proper cake pops! https://artforyourlifestyle.com/2011/10/how-to-make-cake-pops/
It reallllly helps to freeze the cake pops once you have the stick in them before you dip them in chocolate. Then when you dip them just gently bang the stick on the side of the bowl or pot so that the excess chocolate drips off and you’ll be fine! Have fun and good luck! :)
Kendra
During my first attempt at making these fun treats the cake is pretty moist and the balls wont stay together easily. I’m hoping the time in the freezer helps. Maybe I didn’t bake it long enough or let it cool enough?
Hmmm, I’m not sure. Mine were fairly soft too but they would stay together on their own at least. What was the consistency of your icing, maybe it was too runny? I definitely found that freezing them helped me. Hope they turned out!
Thanks for the tutorial! I too tried to make cake pops, my mom sent me the cookbook and they do look so cute. However, when I made mine I think I made the filling too thick and they all fell off the sticks and made a huge mess and didn’t look very pretty! They tasted great and since I think I know my mistakes (and a few others I probably would have made if I hadn’t read this), I think I will give them another shot! =)
Hope it worked the second time around. Another fun idea if you really can’t get them to stay on the sticks is just to make cake balls. My friend makes them and they look like cute iced timbits. Just as yummy too!