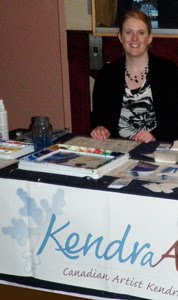
 In January I was a guest artist at the Sun Peaks Winter Wine Festival. To attract people to my table I demonstrated intriguing watercolour techniques using ordinary household items.
I can’t say I ever had a massive crowd lined up at my table; however, one man did wait 15 minutes to find out how to paint a birch tree with a fork! In fact, the organizer of the event came and told me that people were talking about my birch tree with a fork demo all the way up the village!
Here I will share with you the tricks behind the techniques: the unveiling of the magic!
1. How to Paint a Birch Tree with a Fork!
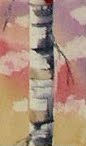 The first step is to paint in the background around the area where you want your tree to go, leaving that part white. Next, wet the paper along the tree trunk and drop in your shadow colours. Then use the handle of the fork to create the birch bark along the tree by pushing it into the paper and dragging it across the tree in various parts of the trunk. This will cause some of the paint to be lifted revealing the white birch, and some of the paint to seep into the crevasses which makes the dark lines of the bark. You can then dab in a few drops of dark paint for contrast. If you paint in any branches, use one of the prongs on the fork to scratch along the branch to create texture.
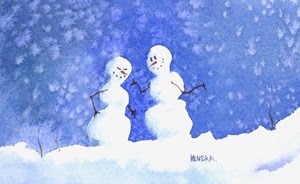
2. Turn Salt into Snowflakes!
 This one is so fun, and literally quite magical.
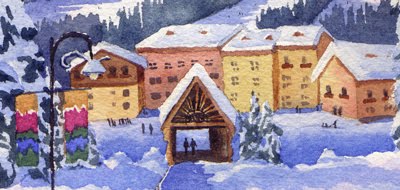
As with the birch tree you must save your whites, so paint your background colour around any white areas, such as the snowmen in this example. While the paint is STILL WET, sprinkle some salt onto the painting.
At first you won’t notice any change, but slowly as the paint dries the salt will absorb some of the water and as it does it will also draw some of the colour towards it. This will leave magical little snowflakes in their wake. The wetter the painting when you drop in the salt the bigger the snowflakes (you can actually get quite a blizzard going), and the drier the paint the smaller the snowflakes will turn out, which works great if you are trying to create stars in the sky!
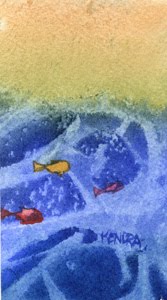
3. Paint Under Water with Cellophane!
 To clarify, I am not actually putting the paper under water and then painting it using cellophane. This is what my dad thought when he read my last blog post. I thought about changing the title to be more clear, but then since the purpose of my titles was to intrigue people, and my dad was immensely curious, I decided to leave it. What I am actually doing is painting an under water scene with the aid of cellophane.
This is also very fun and a great exercise for giving up control since you never know how it is going to turn out. What you do is paint on your background very wet.
Make sure the paint is a lot darker than what you want it to be since a lot of the colour will be lifted off by the cellophane which you then place over the painting.
Press the cellphane into the wet paint and then let it dry. When you peel it off you will see the abstract pattern that it created in the painting. In this case it is meant to represent the light refracting through the water.
4. Use a Candle to Make a Moonlit Reflection
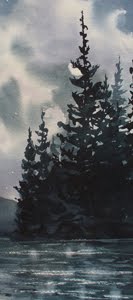 In this exercise take an ordinary white candle (I used a tea light) and rub it gently over the dry paper where you want your reflection to appear. This is a little like using a magic pen to write a secret message which will not be revealed until you paint over it (another great idea for a demo!).
Since you want your horizon to lay flat it is imperative that you use horizontal strokes to create the reflections. The harder you press the whiter the reflections will be. Make sure you don’t get any candle wax above the edge of the water since you won’t be able to cover it up later. Now you simply paint your picture. The darker the colour you use for the water the brighter your reflections will appear.
In this case I waited for the paint to dry and then I used a damp brush to scrub some extra vertical highlights to make it really sparkle.
5. Turn a Carrot into a Person!
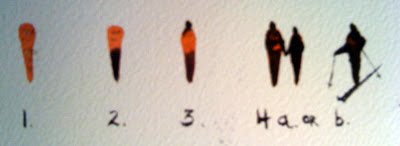
I can’t remember where I learned this trick but it is the best thing for painting natural looking people walking in your landscapes. This one works just like it sounds. First you paint a carrot. It doesn’t have to be orange, but I made this one orange for good effect. Don’t paint the greenery (unless you are painting someone in a Mardi Gras parade). Next add a head. Don’t paint the neck or it will look awkward. That’s pretty much it, but then it’s up to you if you add arms or props like skis and poles!
Here is an example where all the people started out as carrots:
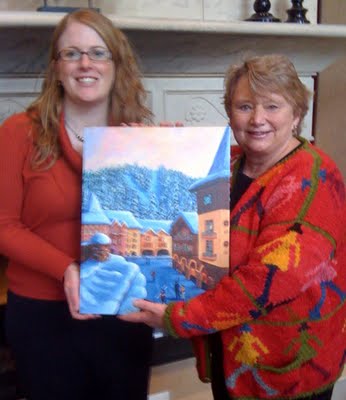
I can’t say I had as many onlookers as I hoped, but I can say that I certainly garnered a lot more interest due to these tips and tricks using everyday items. I also had a free draw which helped attract people over to my table. The highlight of my whole weekend was the delighted reaction from the grand prize winner. She couldn’t have been happier and that absolutely made my day.
Here I am with the winner of my Sun Peaks limited edition giclee.
Nice to see your new post Kendra! I taught a P-8 art class one year and an after school art club another year. I had a couple watercolour classes I taught and used a couple of these fun 'trick' texhniques. But some of these I'd never heard of and are wonderful! Kids love these magical tricks, and aparently adults too ;)
thank you very much :) :) :)
Thank you for the ideas! I love them! :)
Glad you love them. Thanks for visiting!
Thank you so much for these watercolour tips. I am visiting Sun Peaks and I love your paintings. It has been lots of fun to look at your paintings online today too.
I am a beginner in watercolours and am inspired by your paintings and by the techniques that you have shared.
Aww thanks Catherine! I love Sun Peaks. It is overflowing with scenes that inspire me to paint. :)